
Back in 2013 I had the Cheesiest New Year's Resolution. That's right. Unlike some people who resolve to lose weight, or get fit, or quite eating chocolate (some people are just over the top!) I resolved to learn how to make cheese. Not just any cheese, though. I resolved to learn to make cheese from raw milk. Because, that's all I buy. I won't touch store bought milk unless I absolutely have to.
Thankfully, living out in the country on the Eco-Village it's not too difficult to find a neighbor who has a cow and purchase milk. I've made many different kinds of cheese so far including Raw Milk Ricotta, and Queso Blanco.
 The recipe I am sharing today is inspired by one found in my favorite book on fermentation, The Complete Idiot's Guide to Fermentation by Wardee Harmon of GNOWFGLINS. I've heard this cheese called many different things-- Kefir Cheese, Yogurt Cheese, Clabber Cheese. But, whatever you call it, it's absolutely delicious. I love how versatile this recipe is, too. You can flavor it with whatever herbs your feel like, or simply leave it plain.
How to Make Herbed Raw Milk Cheese
Ingredients:
- 1/2 gallon raw milk (how to find)
- 1/2 tsp Celtic sea salt (where to find)
- 2-3 Tablespoons fresh herbs (e.g. sage, oregano, lavender, rosemary, etc.)
- Extra Virgin Olive Oil (where to find)
Equipment:
- 1 quart mason jar (where to find)
- 90-thread-count cheesecloth (where to find)
- Colander
Allow covered milk to set out at room temperature until it separates (typically 2-4 days). Line colander with two layers of cheesecloth and pour in soured milk. Tie the ends of the cheesecloth and hang on a spoon or other object so that the whey can all drain out. Let cloth drip for 1-2 days. Untie once a day or so and stir curds slightly so that all the whey can drain out. Untie cheesecloth and scrape out cheese. Place in a bowl and mix in salt and herbs. Shape into balls. Pour a little bit of olive oil into your quart mason jar and slowly lower in cheese balls. Continue to add olive oil as you layer in cheese. Keeps in the refrigerator for up to 2 weeks.
And now for the step-by-step tutorial with pictures... First things first, of course. Transport your raw milk safely home from the neighbors farm...

Set milk out on counter...

Leave it out until the milk has separated, like so. Typically 2-4 days depending on how hot it is...

Next, line colander with double layer of cheesecloth and pour the soured milk in....

Tie cheesecloth around a spoon or other object to encourage more whey to drain. Eventually, remove the colander and just let the cheesecloth hang....

Hand bag for 2 days until all the whey has drained out. Stir occasionally if need be. Collect your fresh herbs...

Spread cheese in a dish and sprinkle on fresh herbs and salt...

Stir well..

Gently shape into balls...
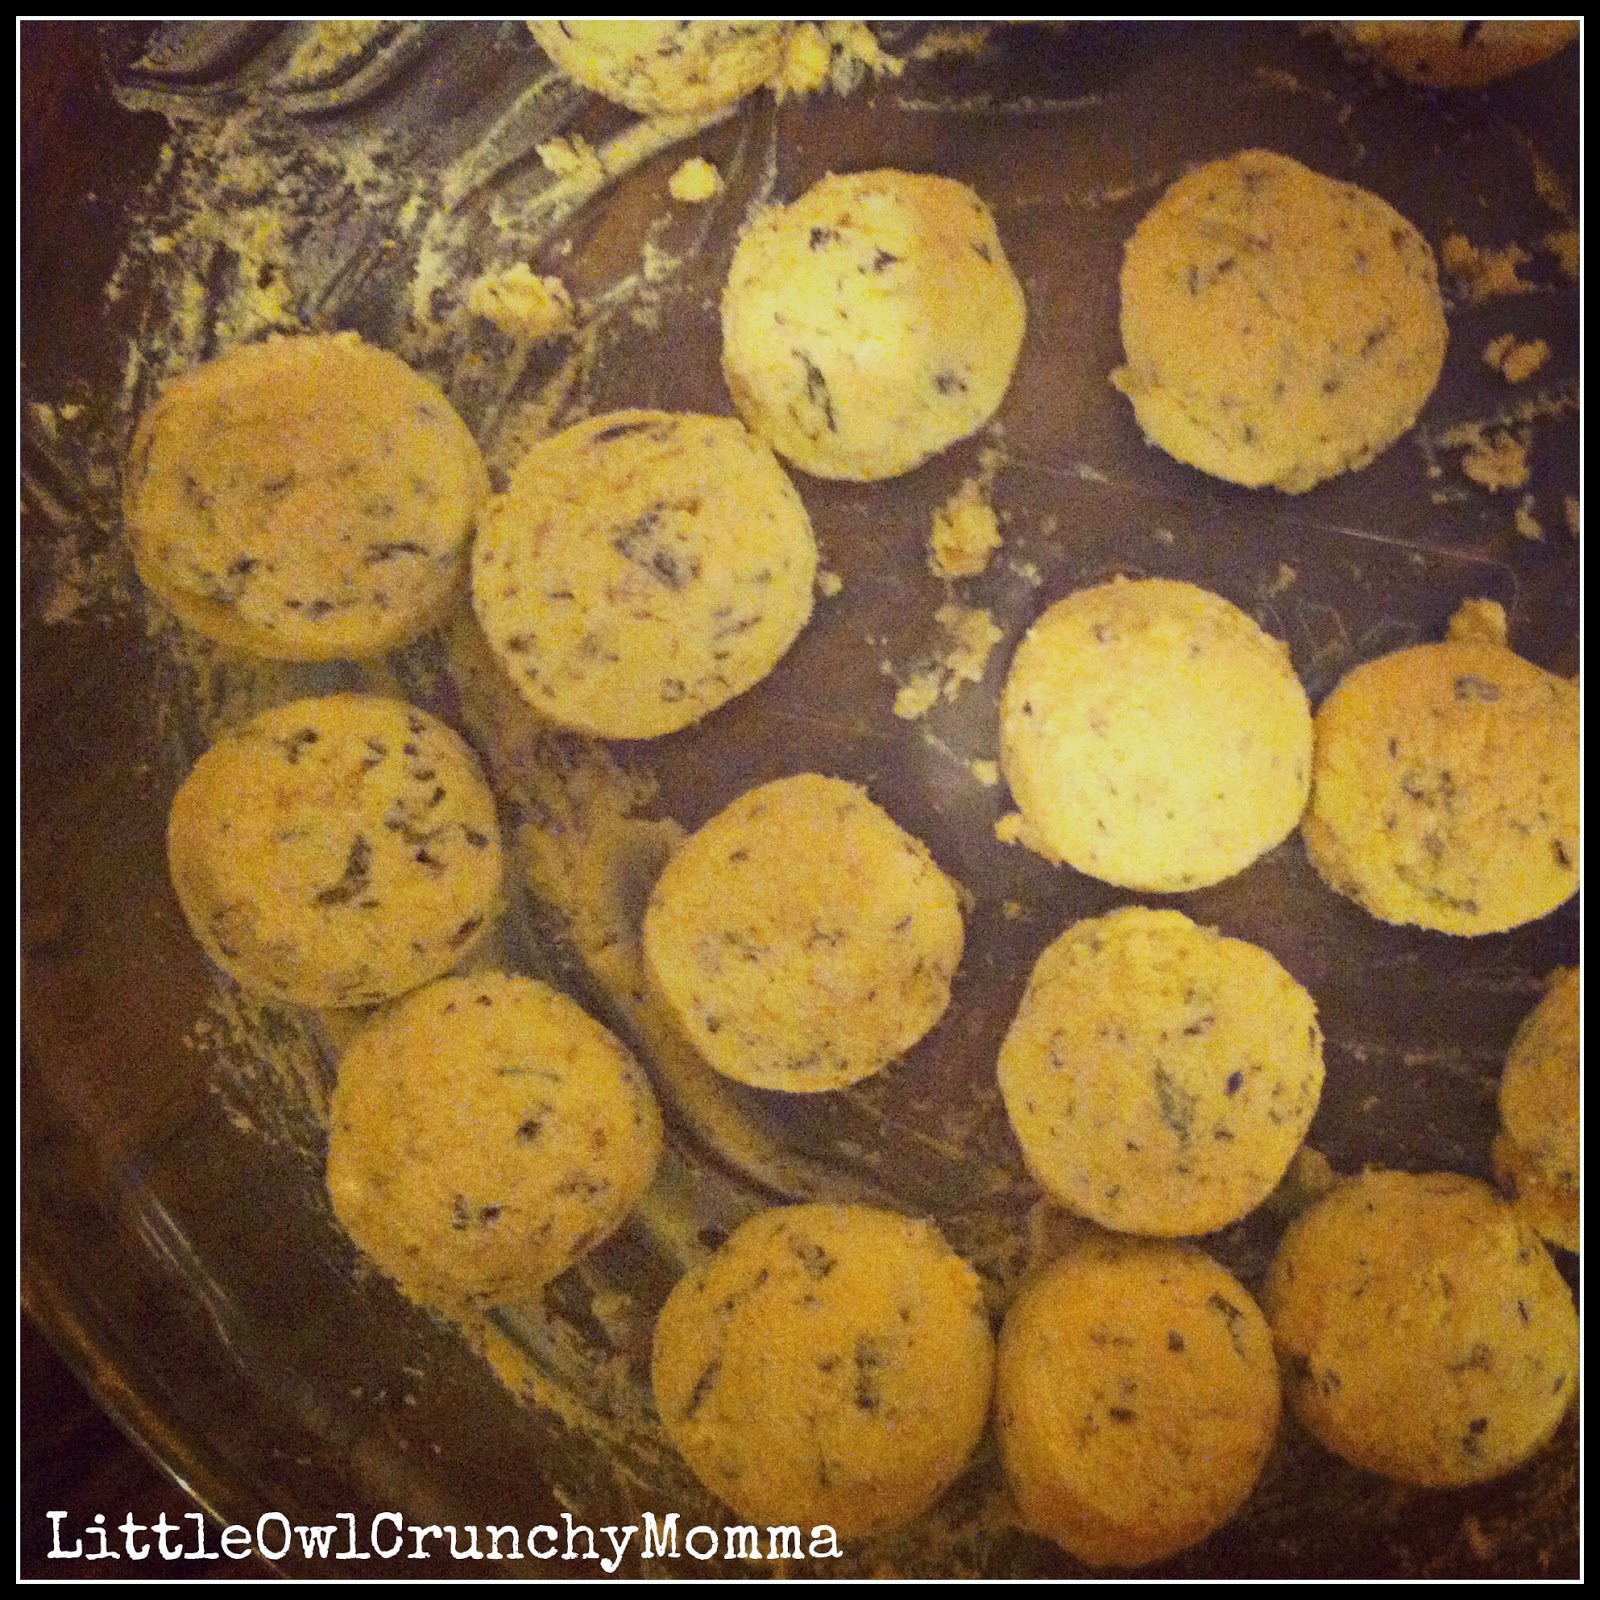
Pour a bit of olive oil into your quart mason jar and gently layer in cheese balls one at a time. Continue to add olive oil to each layer so cheese balls don't stick to each other....

That's it! Unless you briefly want to pose it outside for a pretty picture, keep it in your refrigerator. It stays good for at least two weeks. Enjoy with toast, fish, crackers, as a veggie dip, or just plain. Amazingly delicious!

Like what you read? Be sure and follow LittleOwlCrunchyMomma on Facebook, Twitter, Instagram, Pinterest and Google+
(Note: This post might contain affiliate links. Meaning, if you shop around after clicking on them, you might be helping to support my blogging endeavors. Thank you!)
This post shared at: Wildcrafting
Wednesday, Allergy
Free Wednesday, Gluten-Free
Wednesdays, Home-Making
Link-Up, Wellness
Wednesday, Real-Food
Wednesdays, Works
for Me Wednesday, Penny
Pinching Party, The
Mommy Club, Wake
Up Wednesday, Get
Inspired, Wordless
Wednesday, Linkn
Blogs, Simple
Lives Thursday,
Full
Plate Thursday,
The
Project Stash,
Pennywise
Platter,Green
Thumb Thursdays Green
Idea Thursday,
The
HomeAcre Hop,
Homeschool
Link-Up,
What
to do Weekends, Simple
Meals Friday,
Unprocessed
Fridays,
Party
Brunch Link Party,
Fight
Back Friday,
Friday
Favs,
Link
Party Palooza,
Little
House Friday DIY Linky,
From
the Farm Friday,
Get
Real Link Party Fridays,
Best
of the Weekend,
Creativity
Unleashed,
Family
Fun Friday,
Foodie
Friday,
Friday
Pin Fest,
Gluten
Free Fridays, Strut
Your Stuff,
Savoring
Saturdays,
Simple
Saturday, Our
Sunday Best, The
Homesteaders Hop, Countdown
in Style, Nifty
Thrifty Sunday, Think
Pink Sunday, Snickerdoodle
Sunday, Sunday
Showcase, Clever
Chicks Blog Hop, Natural
Living Monday,
Thank
Goodness It's Monday,
Homestead
Barn Hop,
Mix
it Up Monday!,
Busy
Monday,
Melt
in Your Mouth Monday,
Mouthwatering
Mondays,
Sweet
Sharing Monday,
Mostly
Homemade Mondays,
Show
Me What You Got,
Eat.
Create. Party!,
What'd
You Do This Weekend, Anti-Procrastination
Tuesday,
Create
Link Inspire,
One
Project at a Time,
Fat
Tuesday,
Brag About It,
Do
Tell Tuesday,
Growing
Homemakers,
Live
It Up
I love love love this project! This looks so easy and totally delicious!
ReplyDeleteWow! I have never tried to make my own cheese before. looks fantastic!
ReplyDeleteGreat recipe! Thank you :)
ReplyDeleteLooks yummy.....will have pull half a gallon of kefir from fridge and give it a try! One comment on transporting milk home, please use a cooler and ice, especially if you are going far or transporting raw goat milk.
ReplyDeleteLOL a cooler and ice for a short ride right before leaving it on the counter at room temp to sour..... Yeah anonymous must be with the USDA.
ReplyDeleteGreat project Thank You for sharing!
Lol. I was just thinking this.
DeleteNo I wasn't thinking that, however if you want to drink your milk and not have it taste like a buck goats peepee I would suggest you keep it cool from farm to home especially if you have more than a two minute drive.
DeleteThis sounds intriguing. I will have to investigate where to get raw milk locally to give it a try.
ReplyDeleteFound you on Snickerdoodle Sunday.
I love all that raw milk in the back of your car! I dream of days like that!
ReplyDeleteThank you for sharing your post at the HomeAcre Hop-
ReplyDeleteThis is a featured post today on the Hop.
Sandra
quick question, what can I do with all the whey left over, can I use it like I would regular whey? I hate to waste any part of my raw milk when I get it:-)
ReplyDeleteYes, it can be used the same. It has probiotics (unlike whey from some cheeses, especially cooked ones) and is great for baking also. We feed it to our pigs, also. Plenty of nutrition, and they thrive on it! I leave the milk refrigerated until the cream separates, then take the cream for butter. Then set the milk out to clabber. Once it separates, I drain it and the piggies get the whey. No waste :)
DeleteI am attempting to make anything other than butter with the 2 plus gallons of milk we are getting daily from our wonderful guernsey. I helped my grandmother make butter and cheeses as a kid but oh was I hard headed and didn't learn any of her recipes or tricks. So I tried your recipe since it looked easy and beginner proof. Well after four days all I had was mold growing. Thankfully I'm still hard headed an refuse to give up. So I have a couple questions for you. 1) do you use whole raw milk? 2) I lightly covered the container in plastic wrap. Do I need to put it in a container with a lid?
ReplyDeleteHello! Thanks for commenting. I think I need a few more details on what you did specifically to help out. But yes I use whole raw milk. Sometimes I skim a little cream off the top for coffee, but that's about it. That should make no difference. At what stage did you lightly cover the container? When you left the milk out to separate? Or when you were straining the whey out? And also you said it's been four days which has me concerned that the reason you have mold is because you've left it for too long. Like it says in the instructions, the milk should be out until it separates (2-4 days) and then you let it hang in the cheesecloth 1-2 days only. Did you remember to stir the curds, too? If not, that might be why it molded. But I need to know what you did exactly before I can help. <3 It really is an easy cheese to make!
DeleteThanks for your response. I lightly covered the container of milk when I placed it out. Our house is a little on the cooler side so I was figuring it would take longer to seperate. But after 4 days the cream had seperated and had the mold on it but nothing else had happened. I absolutely refuse to give up! So any ideas as to what went wrong will be greatly appreciated.
DeleteAgain thanks for your reply. I decided to go ahead with another attempt and put the milk in a container with a lid and put it in the bathroom as it is much warmer than the kitchen. Although I have gotten some strange looks for having it in the bathroom it worked!!! It is wry close to being ready to start draining!! I'm beyond excited!
DeleteNecessity is the mother of invention.:) I always keep the jar of milk tightly covered when I am leaving it out to separate. Maybe it grew mold because it was a combination of the cooler temp and the air flow? In any case... glad you figured out what works for you! Let me know how the rest of the process goes. <3
Delete